Quickly create batch image groups using server hosted folders.
Using Batch Hosted in Photo Pro:
- Open the Photo Pro Group stack settings.
- Go to Group Settings → Image Source, select Batch.
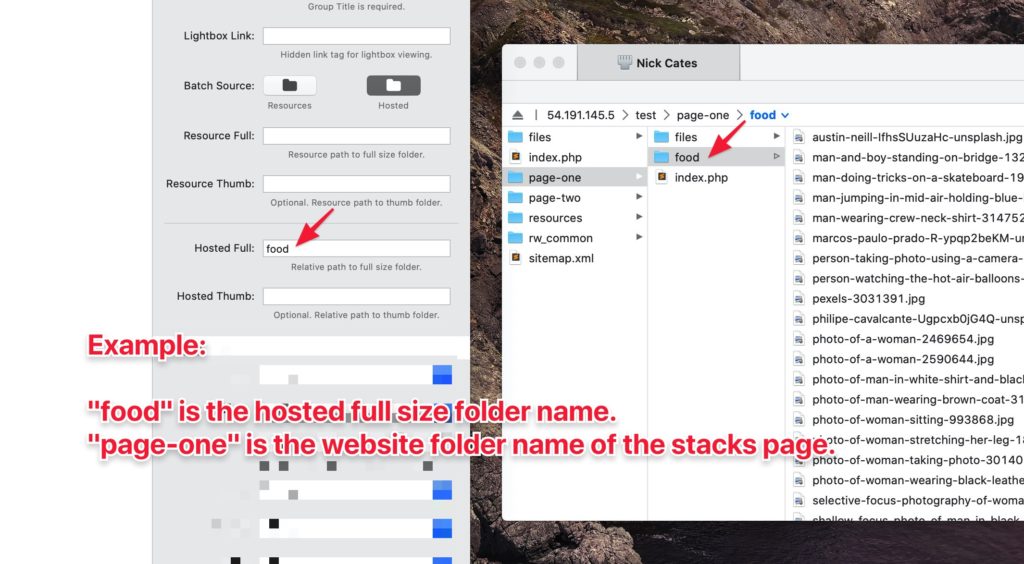
- Go to Batch Source: and select Hosted
- In Hosted Full: enter the folder name that will contain your full size images (this will be a relative path to a full size image folder).
- In Hosted Thumb: optionally enter the folder name that will contain your thumbnail images (this will be a relative path). Leave blank to use full size images for thumbnails.
Adding hosted images to your server:
- To complete a Batch Host setup, you must publish your project. Batch Hosted images will not appear within RapidWeaver Preview.
- With an FTP app (like Cyber Duck or Transmit), access the server to your published site. Go to the folder that contains the Batch Hosted page.
- Add your image folder to this directory. Your image folder name must match the name provided in the Hosted Full: field.
- After adding, with a browser go to your Photo Pro page. Your added images should now appear.
Important Notes:
By default, batch image captions and alt tags are generated from image filenames. Caption text formatting will replace filename dashes with spaces, and capitalize the first letter. For example, a file named “macro-flower.jpg”, will be captioned “Macro flower”. The Meta Caption setting can override this if an embedded meta title or caption is found in the image. Learn more about Meta Captions here.